Notes
What: Notes can be used to record information related to a student profile and are not tied to specific appointments. Depending on role permissions, users can create, edit, delete, and view notes on student profiles, as well as add attachments to the notes.
Where: Notes can be found on the Reports or History tab on a student's profile.
Who: Staff and faculty can use notes to document information about a student that may not be specific to an appointment or visit. Staff and faculty can make a note visible to the student or choose the option of keeping the note private, which means it can only be seen by staff and faculty.
Best Practices: Navigate users take advantage of notes in a variety of ways. Notes can be used like sticky notes, which allow faculty and staff to document any important information that should be visible to anyone working with the student. Guidelines regarding FERPA privacy rules should be used when creating a note on a student's account.
*** The important thing to remember is that all staff and faculty can view the notes on a student's profile and these NOTES become a permanent addition to a student's record.***
You can choose to make the note visible to the student or keep it private.
The note can include:
- Notes from a meeting/interaction with the student
- Notes from an Email from a student
- List of course suggestions
- Appointment status
- Actions/Next Steps
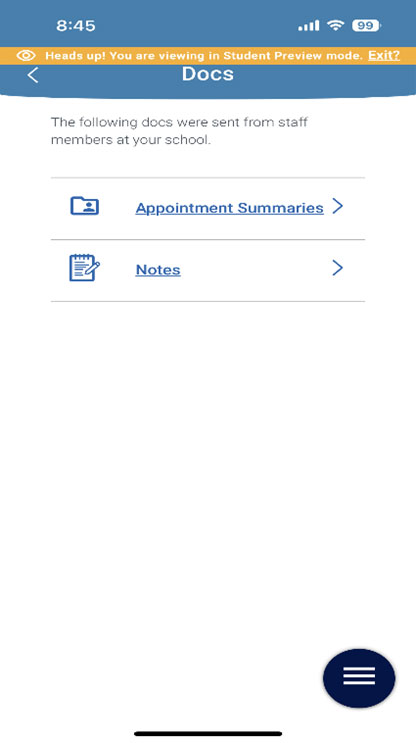
Notes offer an additional mechanism to jot down information about a student, collaborate across Care Units, and create a record of information provided directly to the student. If you make Notes visible to the student, the notes can be seen by the student in MyDocs on their mobile app, or on the Report Tab if the student logs into Navigate via a computer.
Creating a Note:
There are two places to create a note on a student's record.
- Student Profile Overview page
- Student List
Student Profile Overview Page
Once you log into Navigate, use the quick search field at the top of the page and type in a student's name to whom you want to put a note on their record.
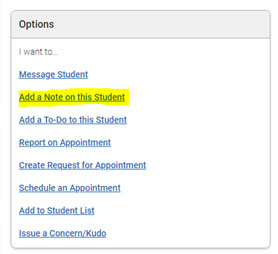
On the right side of the page, you will see a list of "I want to…" actions under Options.
Choose "Add a Note on this Student."
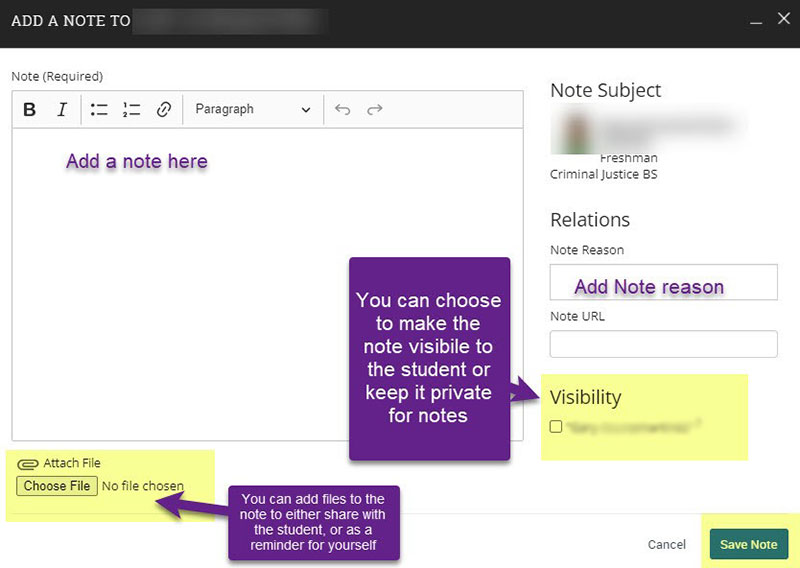
The Add a Note window will open.
- Type in your note in the Note section
- Attach docs, if needed (10MB limit)
- Do you want the student to see the note? If yes, Check off the Visibility checkbox. Leave unchecked if you do not want the student to see the note.
- Students can view the note in their MyDocs on the mobile app or the Reports Tab from a computer.
- Save the note.
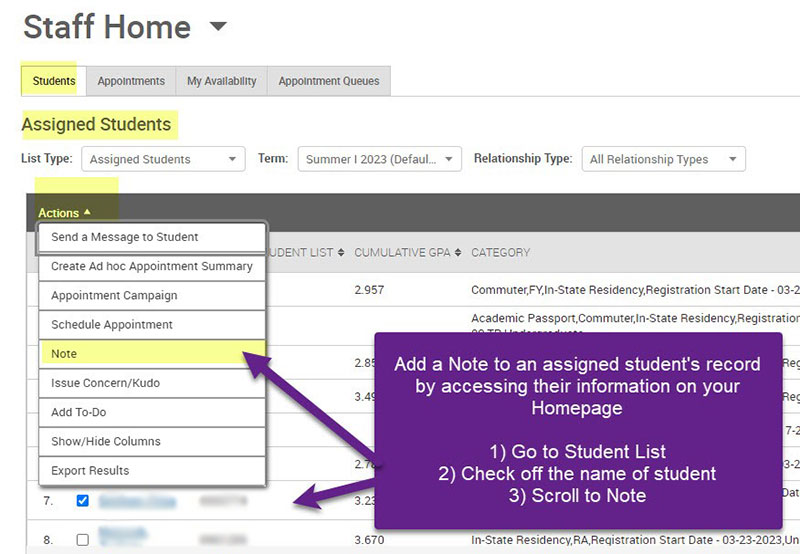
You can also add a note to a student from a Student List.
- Login to Navigate.
- Access your Assigned Student List or Students in My Course
- Check off the name of the student you want to add a note to their record
- Click on the Actions arrow and from the dropdown menu choose Note.
Complete the note, as stated in the instructions above.

Student View:
Mobile App:
Student View on a computer (Advisor checked off Visibility for this student when creating the Note)
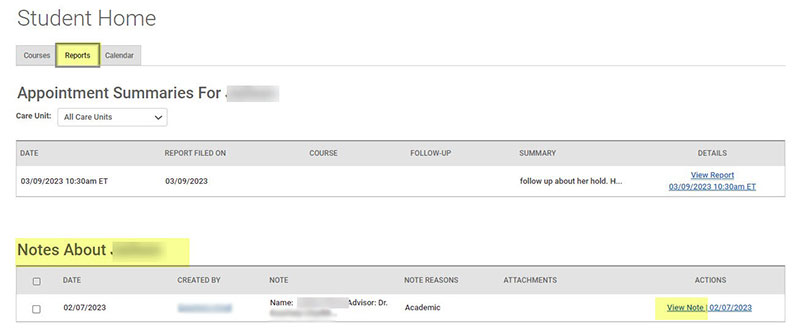
Notes View for Staff/Faculty:
On the Student Profile page, click on the History Tab. Select Note About XX in the History filters View As dropdown, as shown below.
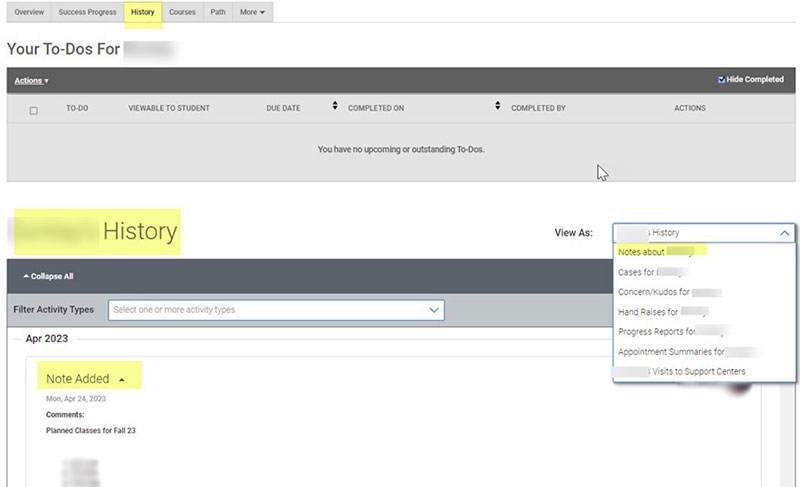
Frequently Asked Questions
If I add a note to a student profile, can anyone see it?
Only users with permission to view student notes will be able to see your note. However, if users have this permission, they can see all notes, regardless of Care Unit. For Care Unit-specific documentation, we recommend creating Appointment Summaries instead.
If I add a note to a student profile, can anyone edit it?
Only users with permission to edit notes that were created by others will be able to edit your note.
Can I add notes for multiple students at once?
Yes! Notes can be added to more than one student at the same time. There is a cap of 100 students for whom notes can be added to at once. This can be done by selecting students in your queue (e.g. Advanced Search) and selecting the "Actions" menu. With the proper permissions, users can click "Note" to add a note to anywhere from 1 to 100 students. If more than one student is selected, the same note scripting will apply to each student record. If more than 100 students are in your queue and selected, the "Note" option will no longer appear within the "Actions" menu.
What is the Notes URL field for?
It is a place to copy and paste a URL. For example, if you spoke with the student about the FAFSA, you can copy and paste a URL to the FAFSA website to share with the student.
What's the attachment size limit for Notes?
10 MB.
